Sunday, March 1, 2015

Craft Closet Makeover!

For me, living in an old house can be charming and quaint. The wood floors have a hump in the hallway that squeaks when you step on it. The treads on the stairs are tiny and tricky to climb up and down. The kitchen is not part of an open floor plan like all of the new houses down the street, but rather tucked in the back overlooking vegetable gardens. I list these traits as positives when most others would probably treat them as negatives. That's just me. Don't get me wrong; there are plenty of quirks in this house that drive me crazy. For example, little teeny tiny closets. Apparently, people in the 40's owned a lot less than we do nowadays because they sure didn't feel the need to incorporate storage! I have worked tirelessly to organize and reorganize every inch of storage in this house to make it more functional, and it's still not done! However, I made HUGE progress recently when I reworked the hall closet into a craft closet for my trunk business. This is the closet in our house that became the dumping ground for all of the odds and ends that no one knew where to keep. You know the one I'm talking about. Its little sister is the junk drawer in the kitchen. We all have one! My dear husband was determined to turn ours into a mini-bar which I certainly would've enjoyed, but it just wasn't practical. I need this space for my trunk business, and I am soooo happy with the way it turned out. Here is the BEFORE:
Time to drag all of that stuff out and go through it. That was probably the worst part!
I chose to take out the shelving and paint the walls to match the hallway. I originally wanted to use something fun like a poppy color or aqua, but decided that IF my husband ever gets his way and turns it into a bar, the neutral color would be more palatable. I reattached the main shelf with cute white brackets instead of the old industrial metal ones and rounded up some storage supplies from other rooms that weren't being used. I painted two sheets of pegboard to match the walls and started organizing. I made a skirt around the table and attached it with hook and loop tape. It hides a cart with supplies under there! And let me just say, "God bless the woman who figured out how to store fabric on comic book boards!" I saved so much space and can actually find what I'm looking for without going through piles of fabric scraps. Love it! AFTER:
Here's a close-up of the fabric storage:
I'm so happy with the result. It looks nice and it's incredibly functional now. Hope you like it, too! Time to go sew something!

Sunday, February 22, 2015

Annie's Trunk and Matching Laundry Bag

It's February and customers are already gearing up for summer camp.  They're either really good planners or they have some serious cabin fever going on with their kids!  Regardless, I just had to post details of the latest summer camp trunk I made.

The task:  Annie is going to camp and wants a pink trunk, but her camp colors are orange and blue.  Her mother and I searched online and in local fabric stores for material that incorporated these colors and was suitable for a young girl.  This was not an easy assignment!  Together we chose 'Hootie Tootie Cutie Floral' and 'Hootie Tootie Cutie Stripe' to coordinate.  The result was adorable!

Check out the matching laundry bag.  Her mother actually ordered two--good thinking!  She must be the 'really good planner' parent and not the 'cabin fever' one.

I chose to add an orange pocket with a blue monogram to the laundry bags to accentuate the camp colors and to provide a spot to stash laundry money.  The orange piping that trims both the lid and base of the trunk helps tie it all together.  Overall, Annie and her mom loved the trunk and laundry bags.  She is ready for summer.  If only Mother Nature would be!!


Friday, April 4, 2014

Victoria's Monogrammed Apron

My oldest daughter, Victoria, is in college at Florida State and has her own apartment now.  She's been cooking on her own and told me the other day that she didn't have an apron.  How the heck did that happen?  I have about ten hanging on a hook and neglected to send any her way when she moved in!?
She asked me to make her one to match her coffee mug that I gave her from Anthropologie.  It's a blue floral print mug with a yellow 'V' on it-very cute!  So back to the fabric store I went!


The floral print is the body of the apron and the chambray is the trim/ties.  The gold fabric is actually left over from her FSU trunk-let's see how long it takes her to notice ;) and is the 'V' on her pocket to match her cup.

Materials:

1 yd apron fabric
1 yd trim fabric or 1" double fold bias tape
small scrap for letter
adhesive backing for applique

I basically followed the same instructions as my Spring Apron post, but did not make a ruffle.  So please adjust the 'length' of the apron to suit your needs.  Add 1inch for seam allowances and cut your fabric.


For the bias tape, you can buy it or make your own.  I made mine with 3 inch strips of chambray fabric, stitched end to end at the selvages to equal roughly 60+ inches.  I like to tie my apron around the back and in the front.  So I keep my ties long.  Make yours how you want it, though!


Hem the straight edges of the apron fabric by folding sides in 1/4", pressing with the iron, repeating the folds and stitching in place.  Don't worry about the curves; they will be covered with the bias tape.


For the pocket:

Cut fabric to the size of the pocket you want.  I used the floral fabric and lined it with the chambray.  I cut two matching rectangles, stitched right sides together leaving a small gap to turn out the fabric and then pressed the seams flat.  I didn't worry about stitching the gap because I knew I would sew it shut when I stitched the pocket to the apron later.

Follow the manufacturer's instructions to applique your letter.  I printed a large 'V' on paper in reverse image and traced it at the window onto the rough side of the backing.  After removing the paper backing to expose the adhesive, I placed it on the back of the gold fabric and cut it out.  Use sharp scissors, but not your good fabric ones!  Then I pressed the letter onto the front side of my pocket, rough side down and fabric side up using a pressing cloth and steam.  Make sure the gap in your pocket is positioned so it will be stitched closed when you sew the three edges to the apron.


Position the pocket onto the apron and pin.  Sew around the three edges.  I like to backstitch at the corners to reinforce them, but you don't have to if you don't want to.


We're almost done!  Pin or clip your bias tape to the top corners of your apron.  I like to stand up with the apron positioned in place and the tape around my neck to find the perfect neck size opening.  Make sure the bias tape is open to the apron and not twisted behind your neck and clip or pin.  Pull gently over your head to make sure it's not too tight!


Finally, stitch along the fold of the bias tape from one end to the other, tucking the ends inside the fold before stitching ends shut.  Voila!  

I hope Victoria loves this apron as much as I do!  


Wednesday, April 2, 2014

Happy Ironing!

The sewing room makeover definitely worked!  I've been very busy!  Within hours of the paint drying, I decided to make a new ironing board cover.  My old one had seen better days!  I think there's a shot of it in my Spring Apron post... Sorry!

I found a very happy spring-y fabric to go with my new blue room and got to work!


If you're interested in trying this out, gather the following:

2 yards of cotton fabric (cheerful and bright!)
2.5-3 yards of 1/4 inch elastic
ruler
scissors
safety pin

Wash and dry your fabric...I forgot and hope it won't shrink too much!

You don't have to be super exact when doing this, but you can be if you want.  I laid my fabric in half lengthways along the ironing board and let it hang over the edge 3-4 inches.


Then I cut freehand around the perimeter as best as I could.

After opening it up flat, I folded the edge over about an inch and pressed with the iron.  Then I folded it again and stitched the edge closed to make a tube all the way around for the elastic.  I left a 2-3 inch opening at one end to pull elastic through and to tie off when I was done.


If you don't want to fold and stitch, I'm sure you could use 2 inch bias tape all the way around to accomplish the same thing.

Attach a safety pin to the end of your elastic and work it through the tube you created until it comes out the other end.  It took a little bit of work to get it through!  My hands were tired!  Once it is though, you should be able to hang on to the ends and stretch the new cover over your ironing board.  Reach underneath and tie the elastic ends together.  Smooth it all out and you're done!  Happy ironing!


Sewing Room Makeover!

I think it's pretty clear that I'm trying to cast off the winter blahs and dive into Spring.  Today is no exception!  Originally, my sewing/laundry room was painted a dark architectural grey color which I liked, but I wanted to freshen it up a bit and get reenergized for Spring.  So off to Sherwin-Williams I went and came home with a gallon of "Watery" which is a sea-glass blue color.  LOVE LOVE LOVE!

Here's BEFORE:

Pretty boring and dreary, right?
And here's the AFTER!


I also swapped desks with my daughter.  I like the white against the blue better.  Time to add some decorations.  New cork board?  Shelves?  Maybe I will try my hand at painting wall plaques!  Yep, I'm reenergized!


Sunday, March 30, 2014

Spring Apron


I stumbled across these fabrics at Jo-Ann's yesterday and decided to give Mother Nature another hint.  I don't care if it's still cold and rainy, I'm moving forward with Spring!  I designed my own Christmas Aprons in December and figured the pattern would work fine for the Spring Apron.


Dana Tip:  Use wrapping paper with grids printed on the back to make symmetrical patterns.  The inch grids help with measuring!

My pattern is 20" along the right side and 15" on the left.  It's 12" across the bottom and 4" across the top.   Fold your fabric in half and lay the pattern with the long side along the fold to create a full apron when opened up.  Adjust your measurements to suit your length.  I've shortened it in the past and made one for my little girl.


At this point you can choose to add a ruffle along the bottom like mine or skip ahead and just finish!
To make the ruffle, I cut 3-4 strips of coordinating fabric 8" wide with a rotary cutter.

I sewed them together at the selvage, right sides together, to make a long strip and pressed the seams open.  Next I finished all the edges by pressing 1/4" all the way around once, folding edges over again and stitching in place to create a nice finished hem.


I did the same thing to the straight edges of the apron, not the curves though.  Those will be finished with bias tape.


I added the "ruffle" to the apron's bottom edge by laying right sides together and working left to right, made little folds and pinned in place.  You can do a true ruffle with gathering if you prefer, or box pleats or whatever!  I just messed around with this pattern and liked the look of the folds.  Save the leftover strip from the end to make a pocket!


Stitch along the edge and remove pins as you go.  I used a 1/2" seam allowance.  Press open and iron.


Using the leftover strip, cut to your size of choice, finish the raw edge like before, and pin in place. Stitch three edges of it to front of apron to make a pocket.  Cute!

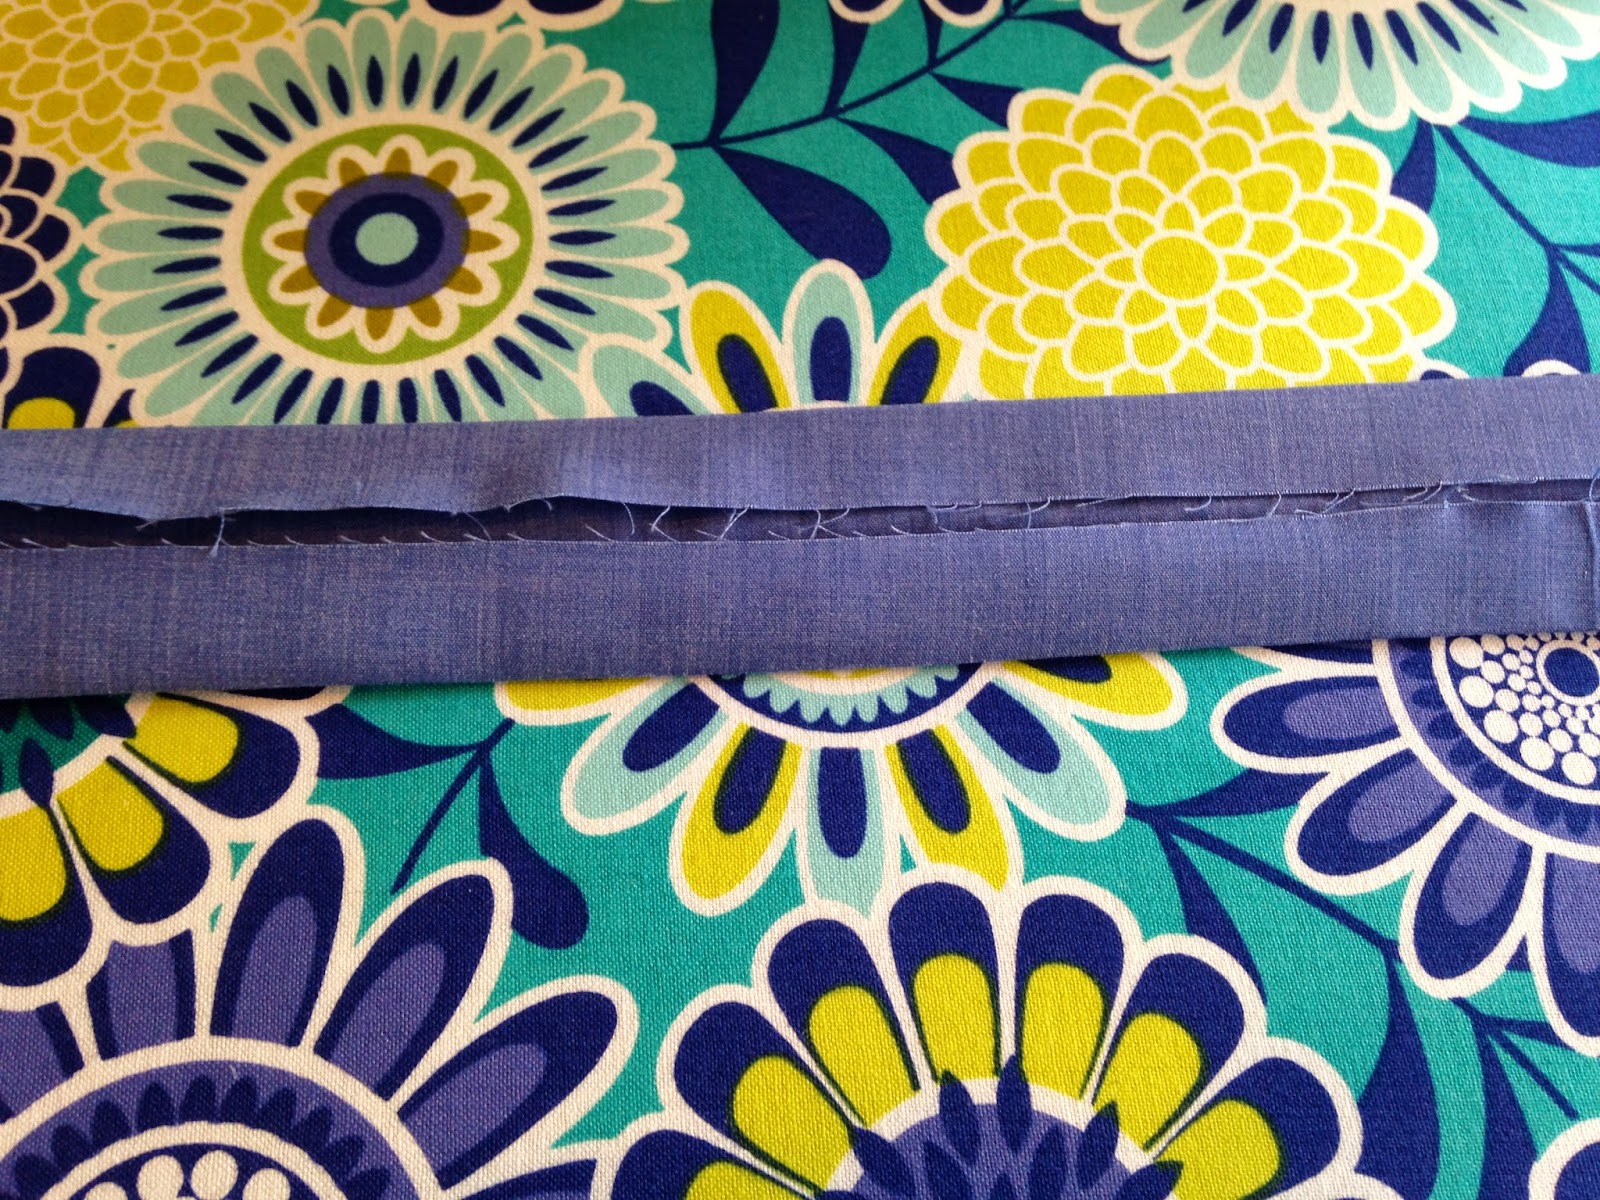
For the neck strap and ties, you can use purchased double fold bias tape or make your own.  I made my own with the coordinating fabric by cutting 3" wide strips and sewing together until I had at least 60".  Press in half with iron lengthways and open. Then fold bottom edge up to crease and press again.  Do the same with the top edge.  Fold both sides together to make a long strip with unfinished edges tucked inside and press flat.


To add the tape to your apron, find the middle of the strip and mark with a pin or clip.  I like sewing clips; binder clips work well, too!  This will be the point directly behind your neck.  Hold the apron to your body and clip the strip to left and right top corners of the apron to get the desired neck opening. Open edge faces the apron.  Make sure it can go over your head and that it is not twisted!  


Tuck the raw edge of the apron curve into the bias fold and clip or pin.  I like to begin in the center of the neck strap and stitch the fold closed all the way down the curve and out toward the end of the waist tie.  Tuck the end of the tie inside itself and stitch closed. Then do the other side. 


I love how this turned out!  Now my girls want matching aprons, too!  Back to the sewing machine :)


BLOGGER TEMPLATE BY DESIGNER BLOGS